IN-SITU BOLT INSPECTION USING PHASED ARRAY ULTRASONIC TESTING:
Bolted connections are crucial structural components which finds application in bridges, pressure vessels flanges, cranes and other offshore structures. During operation all service factors must be considered such as thermal stresses, differential expansion, external loads and vibration. As a result, they are subjected to variable stresses, warpage, distortion or separation during service leading to cracks, corrosion that might lead to catastrophic damage if left unattended. Therefore, periodic monitoring of their integrity is crucial through nondestructive testing methods.
Typical methods of inspecting bolts involve conventional ultrasonic testing with 0 deg probe, calibrating as normal, then scanning round the head of the bolt using normal longitudinal waves.
Another common practice is removing the bolts from the crane and perform visual inspection followed by fluorescent MPI or DPT inspections to look for cracks.
- Conventional UT is operator dependent and interpretation of the results are difficult, as signals are reflected from geometry, bolt threads, and mode conversions occur
- Both MPI and DPT requires access to entire surface for inspection, requiring removal of bolts from service leading to downtime.
- Permanent data record not available for future monitoring purpose
ADVANCED PAUT INSPECTION
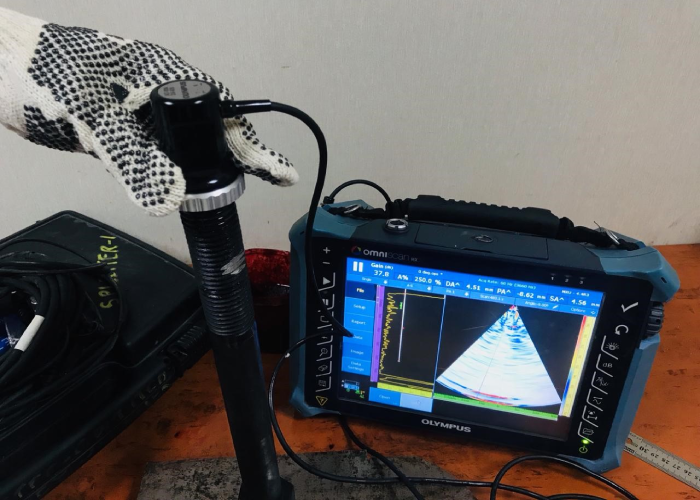
Phased Array (PAUT) is an advanced ultrasonic testing technique which utilizes an array of elements instead of a single crystal which are pulsed individually based on the time delay laws (or focal laws) defined by the user.
This allows sweeping, focusing of ultrasound at desired refracted angles in the job material typically - 30 to +30 deg angles are used.
- Inspection can be done in-situ, without removing the bolts from crane thereby reducing downtime.
- Probability of Detection (POD) for mis-oriented flaws is high compared to single angle inspection since the bolt is examined by a range of refracted angles that could probably give a better reflection from various defect orientations..
- Data recording allows further review and this mitigates chances of false call and critical decision making.
- The software allows data representation in A-Scan, S-Scan, B-Scan making interpretation easier.
METHODOLOGY.
- Calibration bolts representative of the component to be inspected which has a series of machined notches introduced at locations where crack initiation could occur is prepared.
- Set up the phased array instrument to perform a longitudinal wave S-scan (also called a sectorial scan or azimuthal scan) with angle sweep from -30 deg to +30 deg.
- Inspect from both bolt heads and threaded surface.
- The beam sweeps through the vertical plane of the bolt, covering the threads, end, and body
- The array is scanned around the head of the bolt, and full data is collected and stored around the 360deg circumference.
- The data is stored and interpreted for further analysis
CODE COMPLIANCE
The in-situ bolt inspection is acceptable as per ASME Section V Article V Mandatory Appendix IV “Inservice Examination of Bolts”

